---
url: https://nsh.dev/hi/docs/ios
description: "Rust और TSX NSH ऐप्स को iOS पर UIKit views के साथ सिमुलेटर या डिवाइस पर चलाएँ, उन्हें .app और .ipa के रूप में पैकेज करें, और AppView या NativeShell.xcframework के NshAppView की मदद से किसी मौजूदा iOS ऐप में एम्बेड करें।"
---
# iOS
NSH ऐप्स iOS पर UIKit views और CoreText टेक्स्ट के साथ चलते हैं, डिवाइस और सिम्युलेटर दोनों पर, iOS 15.0 से। पूरे ऐप अन्य प्लेटफ़ॉर्म की तरह ही चलते और पैकेज होते हैं, और कोई मौजूदा ऐप अपने views में NSH ऐप्स दिखा सकता है: वह Rust root जिसे वह लिंक करता है या वह TSX जिसे वह लोड करता है, जिसमें उसके डाउनलोड किए गए साइन किए हुए पैकेज भी शामिल हैं, उन सीमाओं और capabilities के अंतर्गत जो वह तय करता है। iOS पर `os()` `Os::Ios` है (TSX में `platform.os` `"ios"` है) और TSX के `ios={{…}}` props लागू होते हैं।
## आवश्यकताएँ
- Mac पर **Xcode**, iOS सिम्युलेटर runtime के साथ (`xcodebuild -downloadPlatform iOS` एक इंस्टॉल कर देता है)। देखें
[Installation](https://nsh.dev/translations/hi/docs/installation.md#ios-and-mac-catalyst)।
- ऐप्स को iPhone और iPad पर **iOS 15.0** या उसके बाद का संस्करण चाहिए।
## ऐप चलाना
Rust ऐप अपनी डायरेक्टरी से चलता है, TSX ऐप अपनी entry का नाम देता है:
```sh
nsh run --target ios # a Rust app
nsh run --target ios --device "iPhone 16 Pro"
nsh run App.tsx --target ios # a TSX app
```
`nsh` पहले से boot हुआ सिम्युलेटर इस्तेमाल करता है, या सबसे नया iPhone boot करता है। Rust ऐप के लिए यह आपके crate के साथ ऐप का अपना runner बनाता है, उसे इंस्टॉल करता है और उसके लॉग टर्मिनल में दिखाता है; crate के Rust कोड में बदलाव होने पर वह दोबारा बनता है और ऐप रीस्टार्ट हो जाता है। TSX ऐप के लिए यह डेवलपमेंट host इंस्टॉल करता है और आपके सेव करते ही ऐप को अप टू डेट रखता है, लॉग टर्मिनल में दिखते हैं। `--device` नाम या UDID से सिम्युलेटर चुनता है। सिम्युलेटर के बिना तेज़ लूप के लिए, Mac पर `nsh run --target catalyst` वही UIKit backend iPhone-आकार की [Mac Catalyst](https://nsh.dev/translations/hi/docs/getting-started.md#mac-catalyst) विंडो में खोलता है।
## पैकेजिंग
```sh
nsh package --target ios-simulator --run # .nsh/out/.app, installed and launched in the simulator
nsh package --target ios --sign "Apple Distribution: Example Inc (ABCDE12345)" --profile AppStore.mobileprovision
```
Rust ऐप की डायरेक्टरी से, ऐप वही iOS runner है जो आपके crate के साथ बना है; TSX ऐप अपनी entry का नाम देता है (`nsh package App.tsx --target ios-simulator --run`)।
`--target ios` डिवाइस, TestFlight या App Store के लिए साइन किया हुआ `.ipa` लिखता है। साइनिंग identities, provisioning profiles और आइकन: [Packaging](https://nsh.dev/translations/hi/docs/packaging.md#ios-devices)।
## iOS ऐप में एम्बेड करना
कोई मौजूदा iOS ऐप NSH ऐप्स को अपने UI के अंदर दिखा सकता है। Rust कोड वाला iOS ऐप आपके crate और `nsh-platform-ios` crate को लिंक करता है और आपका root एक `AppView` में दिखाता है ([Embedding a Rust app](#embedding-a-rust-app))। Swift ऐप `NativeShell.xcframework` को लिंक करता है, जो Swift module वाला एक framework है: आप एक `NshAppView` (एक `UIView`) बनाते हैं, उसे अपनी view hierarchy में कहीं भी जोड़ते हैं और उसमें TSX ऐप या साइन किया हुआ पैकेज लोड करते हैं। आपकी native स्क्रीनें, नेविगेशन और NSH ऐप एक ही UIKit hierarchy में साथ-साथ रहते हैं।
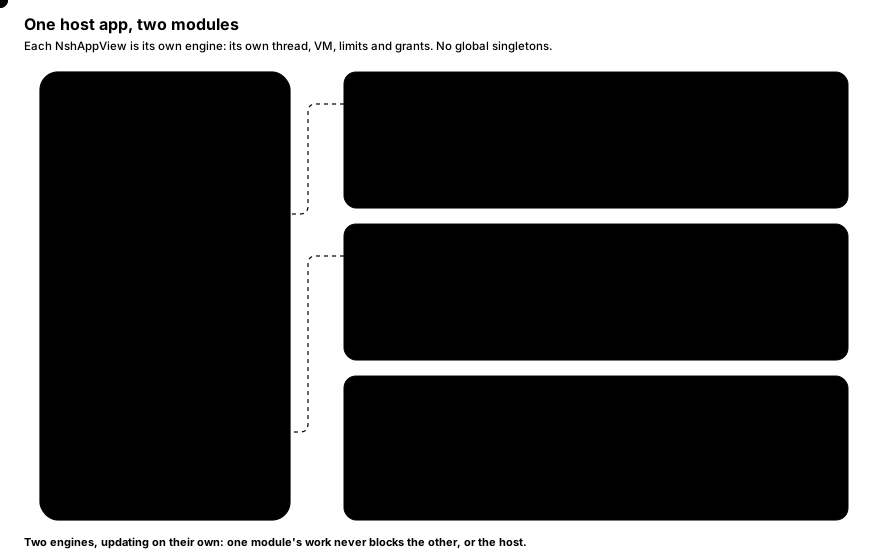
हर view एक स्वतंत्र engine है; कोई global singleton नहीं हैं, इसलिए एक ऐप एक साथ कई NSH ऐप्स दिखा सकता है, उदाहरण के लिए हर टैब में एक।
## Rust ऐप एम्बेड करना
`nsh_platform_ios::AppView` Rust से बने iOS ऐप के लिए `UIView` के रूप में एक engine है: यह आपके crate का root component माउंट करता है, इसमें कोई JavaScript VM शामिल नहीं होता।
```rust
use nsh_platform_ios::{set_ui_sets, AppView, Root, SurfaceOptions};
use objc2::MainThreadMarker;
use objc2_ui_kit::UIView;
fn show(container: &UIView) -> AppView {
// Once, before the first view: the UI sets the apps import (NSH's and your crate's).
set_ui_sets(vec![nsh_base::registry(), my_app::registry()]);
let mtm = MainThreadMarker::new().expect("main thread");
let app = AppView::new(mtm, container.bounds(), SurfaceOptions::default());
container.addSubview(app.view());
app.run(Root::of::());
// Keep the AppView: dropping it stops the app.
app
}
```
view अपने superview के साथ resize होता है। `AppView::run` जो चल रहा था उसे बदल देता है; `AppView::load` उसकी जगह TSX bundle चलाता है (`Bundle::source`, या ऐप bundle में मौजूद `bundle.nshc` के लिए `unsafe { Bundle::bytecode(bytes) }`)। `SurfaceOptions` में सीमाएँ, दी गई capabilities, data डायरेक्टरी और native components रहते हैं, जैसा नीचे `NshAppView` के सदस्य करते हैं; `AppView::set_locale`, `set_font_scale` और `set_error_handler` क्रमशः `locale`, `fontScale` और `onError` से मेल खाते हैं। `nsh package --target ios` इस तरह का ऐप आपके लिए बनाता है, आपके root के माउंट होने के साथ।
## Framework प्राप्त करें
वितरण में दोनों variants शामिल हैं:
```text
dist/nsh/embed/ios/NativeShell.xcframework release: bundles and signed packages
dist/nsh/embed/ios/NativeShellDev.xcframework also connects to a `nsh dev` server
```
NSH के checkout से आप केवल frameworks बना सकते हैं:
```sh
cargo xtask ios-embed # writes dist/nsh/embed/ios/{NativeShell,NativeShellDev}.xcframework
```
डिफ़ॉल्ट build static frameworks बनाता है। dynamic frameworks बनाने के लिए इसका उपयोग करें:
```sh
cargo xtask ios-embed --dynamic
```
Dynamic frameworks runtime को उसकी अपनी library image और unwind table देते हैं, जो उन host ऐप्स को सपोर्ट करता है जो पहले से अन्य Rust runtimes लिंक करते हैं। नीचे दी गई Xcode embedding सेटिंग को अपने बनाए framework के अनुसार चुनें।
डिफ़ॉल्ट रूप से, हर XCFramework में तीन arm64 slices होते हैं: iOS डिवाइस, iOS सिम्युलेटर (Apple silicon) और Mac Catalyst। न्यूनतम deployment target iOS 15.0 है। Swift module library evolution के साथ कंपाइल होता है, इसलिए अन्य Swift compiler संस्करणों से बने ऐप्स उसे import कर सकते हैं, और framework वह सब कुछ लिंक करता है जो उसे चाहिए: आपको कुछ और जोड़ना नहीं पड़ता।
## इसे Xcode प्रोजेक्ट में जोड़ें
1. `NativeShell.xcframework` (या डेवलपमेंट builds के लिए `NativeShellDev.xcframework`) को ऐप target के **Frameworks, Libraries, and Embedded Content** में ड्रैग करें। डिफ़ॉल्ट static frameworks के लिए **Do Not Embed** चुनें, या `--dynamic` से बने dynamic frameworks के लिए **Embed & Sign** चुनें।
2. Swift में, `import NativeShell`।
3. ऐप के `Info.plist` में `CADisableMinimumFrameDurationOnPhone` को `YES` पर सेट करें: ProMotion iPhones पर ऐप के animations तब 120 Hz पर चलते हैं, जैसे स्क्रॉलिंग चलती है (`nsh package` से बने ऐप्स में यह होता है)।
> [!TIP]
> `NativeShellDev.xcframework` को Debug configuration में और `NativeShell.xcframework` को Release में लिंक करें, ताकि केवल डेवलपमेंट builds ही dev server से कनेक्ट हो सकें।
## ऐप के साथ bundle शिप करना
Swift ऐप TSX ऐप्स को bundles के रूप में शिप करता है। NSH ऐप को किसी फ़ोल्डर में build करें और उस फ़ोल्डर को ऐप के resources में `nsh` नाम के folder reference के रूप में जोड़ें:
```sh
nsh build App.tsx --release --out MyApp/nsh
```
`nsh build` यह लिखता है:
| फ़ाइल | विषय-वस्तु |
|---|---|
| `bundle.nshc` | bytecode में कंपाइल किया गया ऐप: लोड होने में सबसे तेज़। |
| `bundle.js` | वही ऐप JS source के रूप में। |
| `bundle.js.map` | उसका source map (stack traces आपकी `.tsx` फ़ाइलों की ओर इशारा करते हैं)। |
| `capabilities.json` | ऐप द्वारा घोषित [capabilities](https://nsh.dev/translations/hi/docs/sandbox-and-capabilities.md), जब `nsh.json` में कोई हों। |
| `assets/` | ऐप द्वारा import की गई images और fonts, entry के सापेक्ष उनके paths पर। |
## ऐप दिखाना
```swift
import NativeShell
import UIKit
final class EmbedController: UIViewController {
private let app = NshAppView()
override func viewDidLoad() {
super.viewDidLoad()
app.translatesAutoresizingMaskIntoConstraints = false
app.onError = { message in print("nsh error: \(message)") }
view.addSubview(app)
NSLayoutConstraint.activate([
app.topAnchor.constraint(equalTo: view.safeAreaLayoutGuide.topAnchor),
app.leadingAnchor.constraint(equalTo: view.leadingAnchor),
app.trailingAnchor.constraint(equalTo: view.trailingAnchor),
app.bottomAnchor.constraint(equalTo: view.bottomAnchor),
])
guard let url = Bundle.main.url(forResource: "bundle", withExtension: "nshc", subdirectory: "nsh") else { return }
do {
try app.loadBundle(at: url)
} catch {
print("cannot load: \(error)")
}
}
// Let the embedded app's pages and dialogs decide the status bar.
override var preferredStatusBarStyle: UIStatusBarStyle { NshAppView.preferredStatusBarStyle }
override var prefersStatusBarHidden: Bool { NshAppView.prefersStatusBarHidden }
override var preferredStatusBarUpdateAnimation: UIStatusBarAnimation {
NshAppView.preferredStatusBarUpdateAnimation
}
}
```
view का आकार ही ऐप की विंडो है: NSH ऐप को view की bounds पर layout करता है और उनके बदलने पर फिर से करता है। दोबारा लोड करने से चल रहा ऐप बदल जाता है; view के deallocate होने पर ऐप रुक जाता है।
पूरा सैंपल, एक UIKit ऐप जो अपने native header के नीचे NSH ऐप दिखाता है, `examples/embed-ios/main.swift` है।
## `NshAppView`
`NshAppView` main actor तक सीमित एक `UIView` subclass है।
| सदस्य | विवरण |
|---|---|
| `init(frame: CGRect = .zero, trace: Bool = false)` | view बनाता है। `trace` हर commit का समय लॉग करता है। `init?(coder:)` storyboards और nibs को सपोर्ट करता है। |
| `onError: ((String) -> Void)?` | घातक ऐप त्रुटियाँ (लोड न हो पाने वाला bundle, अनकॉट JS exceptions, किसी सीमा से रोका गया VM) main thread पर प्राप्त करता है। त्रुटियाँ हमेशा लॉग होती हैं; डेवलपमेंट builds उन्हें ऐप के ऊपर भी दिखाते हैं। |
| `limits: NshLimits` | अब से लोड होने वाले ऐप्स की VM सीमाएँ। |
| `grantCapabilities(_ json: String?) throws` | अब से लोड होने वाले ऐप्स अधिकतम क्या कर सकते हैं, JSON के रूप में, `nsh.json` के `capabilities` के रूप में; `nil` वह सब देता है जो हर ऐप घोषित करता है। अमान्य JSON के लिए `NshError` throw करता है। |
| `locale: Locale?` | उपयोगकर्ता की भाषा और क्षेत्र की जगह ऐप की भाषा और क्षेत्र: `Intl`, `locale()` और components तुरंत उसका पालन करते हैं, और बाद में लोड होने वाले ऐप्स उसी में शुरू होते हैं। `nil` सिस्टम की भाषा और क्षेत्र का पालन करता है। |
| `fontScale: CGFloat?` | Dynamic Type की जगह टेक्स्ट का आकार (1 डिफ़ॉल्ट है): टेक्स्ट और inputs उसी पर फिर से layout होते हैं और `fontScale()` उसे पढ़ता है, तुरंत और बाद में लोड होने वाले ऐप्स के लिए; लंबाइयाँ अपना आकार बनाए रखती हैं। `nil` सिस्टम के आकार का पालन करता है। |
| `setThemeOverrides(_ json: String?) throws` | ऐप के [theme](https://nsh.dev/translations/hi/docs/tailwind.md#theme-tokens) के ऊपर host का brand: `nsh.json` के `"theme"` के format में एक theme फ़ाइल। इसके tokens ऐप के उसी नाम वाले tokens पर भारी पड़ते हैं, light और dark mode दोनों में, और ऐप के बाकी tokens बने रहते हैं। तुरंत और बाद में लोड होने वाले ऐप्स पर लागू होता है; `nil` ऐप को उसका अपना theme वापस दे देता है। ऐसी फ़ाइल के लिए जो parse नहीं होती, `NshError` throw करता है। |
| `storageDirectory: URL?` | जहाँ अब से लोड होने वाले ऐप्स अपना [storage](https://nsh.dev/translations/hi/modules/nsh.md#storage) रखते हैं; `nil`: `Library/Application Support/nsh/`, ऐप की अपनी id से। |
| `cacheOptions: NshCacheOptions` | जहाँ अब से लोड होने वाले ऐप्स अपने caches, [डाउनलोड की गई images](https://nsh.dev/translations/hi/docs/images-and-assets.md#kept-on-disk) रखते हैं, और हर ऐप कितना रखता है: `location` `.system` (`Library/Caches/nsh`, हर ऐप `` में), `.directory(URL)` या `.off`; `images` `.default` (256 MB), `.maxSize(megabytes:)` या `.off`। |
| `loadBundle(at url: URL) throws` | `nsh build` द्वारा लिखा गया bundle चलाता है। Assets उसके बगल के `assets/` से आते हैं; उसके बगल के `bundle.js.map` और `capabilities.json` भी पढ़े जाते हैं। |
| `run(_ package: NshPackage)` | सत्यापित साइन किया हुआ पैकेज चलाता है (नीचे देखें)। एक पैकेज एक बार चलता है। |
| `loadPackage(at:trust:) async throws -> NshPackage.Info` | किसी URL के पैकेज को main thread से बाहर सत्यापित करता है, फिर चलाता है। अस्वीकार होने का कारण throw करता है; चल रहा ऐप बना रहता है। |
| `connectDevServer(_ url: URL) throws` | डेवलपमेंट: `nsh dev` server से लोड करता है और हर बदलाव पर रीलोड करता है। `NativeShell.xcframework` के साथ throw करता है, जिसमें डेवलपमेंट सपोर्ट नहीं है। |
| `register(component:_:)` | एक [native component](https://nsh.dev/translations/hi/docs/native-components.md) रजिस्टर करता है। |
| `params: [String: Any]` | अब से लोड होने वाले ऐप्स के launch parameters: ऐप उन्हें शुरू में `host.params` ([`host`](https://nsh.dev/translations/hi/modules/nsh.md#host)) के रूप में पढ़ता है। |
| `send(_ name: String, _ data: Any? = nil)` | ऐप को एक event भेजता है (`host.on(name, …)`); जब तक वह सुनना शुरू न करे तब तक सहेजा जाता है, या जब कोई ऐप न चल रहा हो तो अगले ऐप के लिए। |
| `handle(_ name: String, _ handler:)` | main thread पर `name` के लिए ऐप के calls (`host.call`) और posts (`host.post`) को संभालता है: `{ data, reply in … }`, या `async throws` function `{ data in … }` जिसका परिणाम call का उत्तर देता है। |
| `removeHandler(_ name: String)` | `name` का handler हटाता है: ऐप के उसके calls तुरंत विफल हो जाते हैं। |
| `static preferredStatusBarStyle`, `prefersStatusBarHidden`, `preferredStatusBarUpdateAnimation` | चल रहे ऐप्स ने क्या माँगा (उनके pages और dialogs का `statusBar`, `nsh.json` का डिफ़ॉल्ट): उन्हें hosting view controller के overrides से लौटाएँ। |
> [!IMPORTANT]
> `bundle.nshc` (bytecode) केवल ऐप bundle के अंदर से लोड होता है। QuickJS bytecode को validate नहीं करता, इसलिए कहीं और से आया bytecode मेमोरी को दूषित कर सकता है: ऐप bundle के बाहर की फ़ाइल के लिए `bundle.js` (JS source) लोड करें, या बेहतर, [signed package](https://nsh.dev/translations/hi/docs/signed-packages.md) का उपयोग करें।
`limits`, `grantCapabilities`, `storageDirectory` और `cacheOptions` अगले लोड से लागू होते हैं: उन्हें `loadBundle` / `run` से पहले सेट करें।
हर ऐप अपना storage बिना किसी सेटिंग के अपनी id के अंतर्गत रखता है: साइन किया हुआ पैकेज उस id के अंतर्गत जिसकी गारंटी उसकी release key का certificate देता है, bundle अपने `nsh.json` के `id` के अंतर्गत (`app.json` उसके बगल में, `nsh build` द्वारा लिखी गई)। किसी ऐप का डेटा host की चुनी जगह रखने के लिए `storageDirectory` सेट करें:
```swift
app.storageDirectory = FileManager.default
.urls(for: .applicationSupportDirectory, in: .userDomainMask)[0]
.appendingPathComponent("nsh/com.example.orders")
try app.loadBundle(at: url)
```
## ऐप से बात करना
view और उसमें चल रहा ऐप अपने अलग channel ([`host`](https://nsh.dev/translations/hi/modules/nsh.md#host)) से बात करते हैं: launch parameters जिन्हें ऐप शुरू में पढ़ता है, host ऐप से events, और ऐप से calls और posts, JSON डेटा के साथ (इस तरफ़ Foundation objects)। इसके लिए ऐप में कोई view और कोई native component नहीं चाहिए।
```swift
// Before loading: what the app opens first (`host.params` in TSX).
app.params = ["conversation": notification.conversationID]
try app.loadBundle(at: url)
// The app's `await host.call("user.profile", { id })`: return the answer, or throw to reject it.
app.handle("user.profile") { data in
let id = (data as? [String: Any])?["id"] as? Int ?? 0
let profile = try await api.profile(id: id)
return ["id": id, "name": profile.name]
}
// A handler that answers later, from any thread, with its reply.
app.handle("photo.pick") { _, reply in
picker.present { url in
if let url { reply.resolve(url.absoluteString) } else { reply.reject("cancelled") }
}
}
// The app's `host.post("analytics", …)`: no answer.
app.handle("analytics") { data, _ in analytics.log(data) }
// Later: the app hears `host.on("conversation.open", …)`.
app.send("conversation.open", ["id": tapped.conversationID])
```
Handlers main thread पर चलते हैं; call ऐप में अपने उत्तर की प्रतीक्षा करता है, बिना किसी भी तरफ़ को ब्लॉक किए। बिना उत्तर दिए छोड़ दिया गया reply call को विफल कर देता है, और ऐसे नाम का call जिसका कोई handler नहीं है, तुरंत विफल हो जाता है। ऐसे नामों के events जिन्हें ऐप अभी नहीं सुन रहा, तब तक सहेजे जाते हैं जब तक वह सुनना शुरू न करे, और जो events तब भेजे जाते हैं जब कोई ऐप नहीं चल रहा (`loadBundle` से पहले, रीलोड के दौरान) वे अगले ऐप को जाते हैं, इसलिए ऐप शुरू होते समय टैप की गई notification भी उस तक पहुँचती है।
## Theme overrides
कई brand वाले host ऐप्स में एम्बेड किया गया एक ऐप हर host का brand अपनाता है: host वे tokens देता है जिन्हें उसका brand बदलता है, `nsh.json` के `"theme"` (shadcn/ui का `cssVars`, मान जैसे CSS लिखता है) के format में theme फ़ाइल के रूप में। वे ऐप के उसी नाम वाले tokens पर भारी पड़ते हैं; ऐप के बाकी tokens बने रहते हैं। किसी token का dark-mode मान `dark` के अंतर्गत दें (केवल `light` या `theme` के अंतर्गत सेट किया गया एक सेट दोनों modes में वही रंग है):
```swift
try app.setThemeOverrides("""
{ "cssVars": {
"theme": { "radius": "0.75rem" },
"light": { "primary": "#e11d48", "primary-foreground": "#ffffff" },
"dark": { "primary": "#fb7185", "primary-foreground": "#1c1917" }
} }
""")
try app.loadBundle(at: url)
```
इसे लोड करने से पहले या बाद में कॉल करें: `bg-primary` और `rounded-(--radius)` जैसी classes तुरंत restyle हो जाती हैं, और बाद में लोड होने वाला हर ऐप overrides के साथ अपने पहले frame में शुरू होता है। `setThemeOverrides(nil)` ऐप को उसका अपना theme वापस दे देता है।
## ऐप द्वारा खोले गए Links
ऐप जो URLs खोलता है ([`openUrl`](https://nsh.dev/translations/hi/modules/nsh.md#openurl), `links="open"` वाले `TextView` के links) वे पहले main thread पर `onOpenURL` तक पहुँचते हैं: जब host ऐप ने URL को संभाल लिया हो, जैसे उसे अपने router से रूट करके, तो `true` लौटाएँ, और सिस्टम द्वारा उसे `UIApplication.open` से खोलने के लिए `false` लौटाएँ। `onOpenURL` के बिना सिस्टम हर URL खोलता है। URLs ऐप की `openUrl` capability द्वारा उन्हें अनुमति देने के बाद उस तक पहुँचते हैं।
```swift
app.onOpenURL = { url in
// The host app's own links open in the host app.
if url.scheme == "lb" || url.host == "longbridge.com" {
router.open(url)
return true
}
return false
}
```
## सीमाएँ
```swift
app.limits = NshLimits(memoryMB: 128, callBudget: 1, maxNodes: 50_000)
```
| `NshLimits` फ़ील्ड | डिफ़ॉल्ट | अर्थ |
|---|---|---|
| `memoryMB: UInt32?` | 256 | MB में JS heap। खत्म होने पर ऐप रुक जाता है। |
| `stackKB: UInt32?` | 4096 (अधिकतम भी) | KB में interpreter stack। अधिक गहरी recursion `RangeError` throw करती है। |
| `loadBudget: TimeInterval?` | 10 s | bundle को evaluate करने का समय। |
| `callBudget: TimeInterval?` | 2 s | JS में किसी अन्य call का समय (एक event, एक timer, एक frame)। सीमा पार करने वाली call बीच में काट दी जाती है। |
| `maxNodes: UInt32?` | 200 000 | ऐप कितने nodes रख सकता है। |
`nil` डिफ़ॉल्ट बनाए रखता है। हर सीमा के पार होने पर क्या होता है: [Sandbox and capabilities](https://nsh.dev/translations/hi/docs/sandbox-and-capabilities.md)।
## Capabilities
ऐप अपने `nsh.json` में घोषित करता है कि वह किस तक पहुँच सकता है; एम्बेड करने वाला ऐप कम दे सकता है। किसी अनुरोध को दोनों से अनुमति मिलनी चाहिए:
```swift
try app.grantCapabilities("""
{
"network": { "hosts": ["api.example.com", "*.cdn.example.com"] },
"webview": { "hosts": ["help.example.com"] }
}
""")
try app.loadBundle(at: url)
```
यहाँ ऐप status bar सेट नहीं कर सकता (कोई `statusBar` नहीं), भले ही उसका `nsh.json` इसके लिए कहे। विवरण: [Sandbox and capabilities](https://nsh.dev/translations/hi/docs/sandbox-and-capabilities.md)।
## साइन किए हुए पैकेज
ऐप जो कोड डाउनलोड करता है (अपडेट, तृतीय-पक्ष mini apps) उसे चलाने के लिए [signed packages](https://nsh.dev/translations/hi/docs/signed-packages.md) का उपयोग करें: `nsh publish` एक `.nshpkg` लिखता है जो ऐसी release key से साइन किया गया है जिसे आपकी root key ने प्रमाणित किया है, और ऐप उसे चलाने से पहले सत्यापित करता है।
```swift
let support = FileManager.default.urls(for: .applicationSupportDirectory, in: .userDomainMask)[0]
let trust = try NshTrust(stateDirectory: support.appendingPathComponent("nsh"))
try trust.addRoot(rootPublicKey) // the contents of root.pub from `nsh keygen`
Task {
do {
let info = try await app.loadPackage(at: downloadedFile, trust: trust)
print("running \(info.id) \(info.version) (build \(info.build))")
} catch {
print("refused: \(error)") // the running app stays
}
}
```
पहले सत्यापित करने और बाद में चलाने के लिए, दोनों चरणों को अलग करें:
```swift
let package = try await trust.openPackage(at: downloadedFile) // verifies off the main thread
// ... decide, ask the user, ...
app.run(package)
```
| API | विवरण |
|---|---|
| `NshTrust(stateDirectory: URL) throws` | trust store खोलता या बनाता है। उसकी state (नवीनतम revocation list, हर ऐप के लिए स्वीकार किया गया सबसे ऊँचा build) वहीं बनी रहती है, और पैकेजों के assets उसके अंतर्गत extract होते हैं। `addRoot` तक किसी key पर भरोसा नहीं करता। Thread-safe। |
| `addRoot(_ publicKey: String) throws` | किसी root public key पर भरोसा करता है (base64, `.pub` फ़ाइल की सामग्री)। कई roots पर भरोसा किया जा सकता है। |
| `updateRevocations(_ json: String) throws` | `nsh revoke` द्वारा लिखी गई revocation list लागू करता है, जो किसी trusted root से साइन की गई हो और store में मौजूद सूची से नई हो। |
| `openPackage(at: URL) async throws -> NshPackage` | सत्यापित करता है, assets extract करता है और पैकेज स्वीकार करता है (उस ऐप के पुराने builds तब से अस्वीकार हो जाते हैं)। |
| `NshPackage.info` | अंदर मौजूद ऐप के `id`, `name`, `version`, `build`। |
| `NshError` | वह त्रुटि जो हर throwing call throw करती है; `message` कारण बताता है। |
## विकास
`NativeShellDev.xcframework` के साथ, व्यू को बंडल की जगह एक dev server की ओर पॉइंट करें:
```swift
#if DEBUG
try app.connectDevServer(URL(string: "ws://127.0.0.1:8790/ws")!)
#else
try app.loadBundle(at: bundledURL)
#endif
```
अपने Mac पर `nsh dev App.tsx` चलाएँ। सिमुलेटर Mac का नेटवर्क साझा करता है, इसलिए `127.0.0.1` सर्वर तक पहुँच जाता है; डिवाइस उस LAN पते का उपयोग करता है जिसे `nsh dev` प्रिंट करता है (`devices on this network: ws://192.168.1.20:8790/ws`)। हर सेव ऐप को उसी जगह अपडेट कर देता है, लॉग `nsh dev` टर्मिनल में दिखाई देते हैं, और त्रुटियाँ ऐप के ऊपर दिखाई जाती हैं। देखें [Dev server और डीबगिंग](https://nsh.dev/translations/hi/docs/dev-server-and-debugging.md)।
> [!NOTE]
> डिवाइस पर, आपके Mac से कनेक्शन सामान्य लोकल नेटवर्क ट्रैफ़िक होता है, जो सादे `ws://` और `http://` (assets) पर चलता है।
> iOS उपयोगकर्ता से लोकल नेटवर्क एक्सेस की अनुमति माँग सकता है, और ऐप की App Transport Security सेटिंग्स को इसकी अनुमति देनी होगी।
## टिप्पणियाँ
- **थ्रेड।** `NshAppView` main-actor isolated है। `NshTrust`, `NshPackage` और `NshComponentContext` थ्रेड-सेफ़ हैं।
JS इंजन अपने अलग थ्रेड पर चलता है; मुख्य थ्रेड कभी उसका इंतज़ार नहीं करता।
- **स्टेटस बार।** एम्बेडेड ऐप के पेज और डायलॉग (`statusBar`) यह बदल देते हैं कि `NshAppView.preferredStatusBarStyle` और उससे जुड़े मेथड क्या लौटाते हैं;
होस्टिंग व्यू कंट्रोलर को इन्हें आगे फ़ॉरवर्ड करना होगा, जैसा ऊपर के उदाहरण में है।
- **सेफ़ एरिया।** ऐप्स Rust में `safe_area()` का उपयोग करते हैं, और TSX में हमेशा की तरह padding में `env(safe-area-inset-*)` या [`nsh`](https://nsh.dev/translations/hi/modules/nsh.md#safe-area-and-keyboard) से `safeAreaInsets()` का उपयोग करते हैं। आपके अपने हेडर के नीचे रखा गया `NshAppView` वे इनसेट पाता है जो उस पर लागू होते हैं, विंडो के नहीं।
- **Mac Catalyst।** वही फ़्रेमवर्क Catalyst ऐप्स में भी काम करता है।
## यह भी देखें
- [Rust के साथ बिल्ड करना](https://nsh.dev/translations/hi/docs/rust.md)
- [Android ऐप्स में एम्बेड करना](https://nsh.dev/translations/hi/docs/android.md)
- [Native components](https://nsh.dev/translations/hi/docs/native-components.md)
- [साइन किए गए पैकेज](https://nsh.dev/translations/hi/docs/signed-packages.md)
- [Sandbox और capabilities](https://nsh.dev/translations/hi/docs/sandbox-and-capabilities.md)